
We all know that Instagram has moved to a more video-friendly format over the last year or so. While many of us have adapted to it and have seen success with growth and engagement by utilizing the reels feature. The rest of us have been kind of fumbling along wondering how to master them. There are several key features to know when creating a reel and we'll discuss them throughout this blog to get you dancing (you don't really have to dance) on camera in no time! Before you know it, you'll see your insights increasing positively and over time - more customers converting. Just what you wanna see!
Step 1: Don't Be Afraid To Show Your Face
It can be scary getting in front of a camera, especially if you're a millennial or have anxiety (ask us how we know), but social media users react better when there is someone they can relate to on the screen. This is why getting in front of the camera is so important. Take a deep breath and just go for it. You can do a wide variety of actions from lipsyncing, pointing to text boxes, and fun transitions, to get started. The best place to start is with what's trending and recreate those first until you are comfortable in front of the camera. Then you can start creating your own on-camera moves! Just remember at the end of it all you want to be authentic so let your personality shine bright and have fun with it!
Pro Tip: Start small, just doing small motions, like pointing until you feel comfortable.
Step 2: Master The Shot
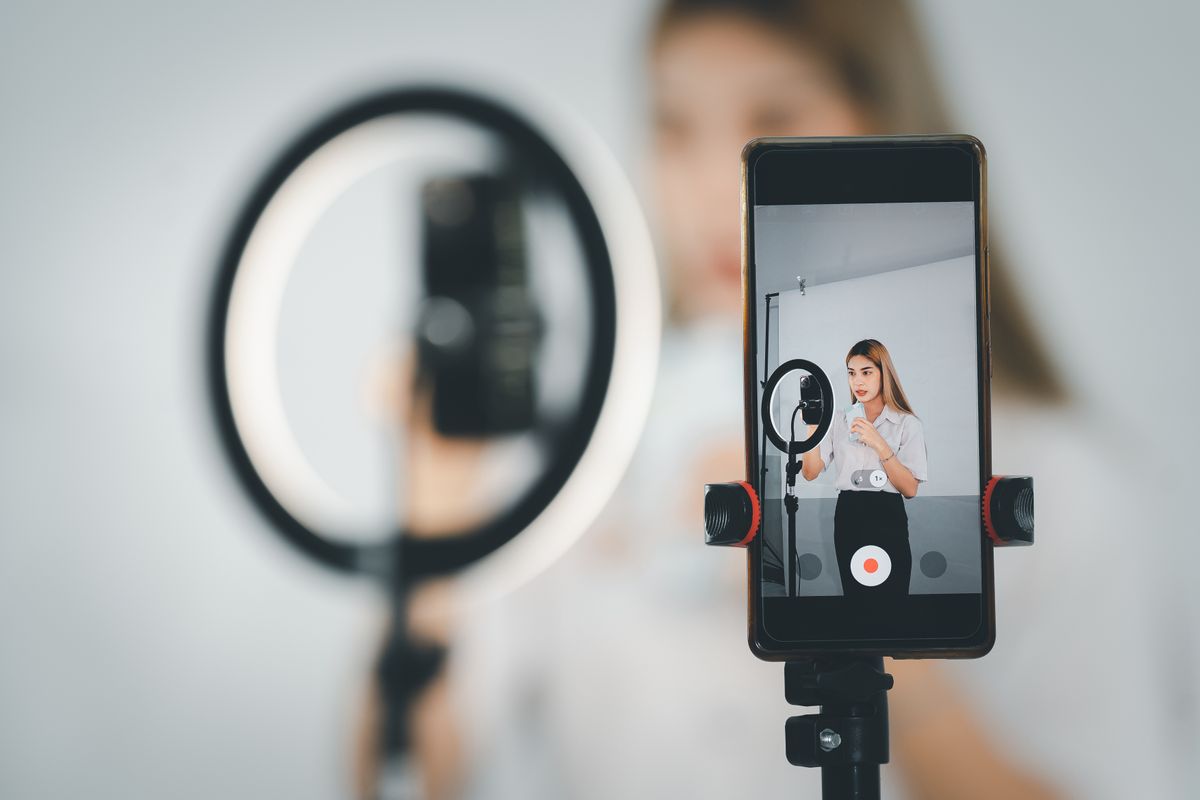
Alright, you're amped up and ready to go! The next question is - where are you standing right now? Are you in a corner or your bathroom? How's the lighting? What does your background look like? Take a good look around to make sure nothing is in the background that you don't want potentially seen by thousands of people! Next up is lighting! Simply put, the better the lighting the better your reel will do. People want to see you if a reel is too dark it'll get overlooked before they ever see you're promoting. We recommend getting a ring light, it makes setup a breeze and you can warm or cool the light as needed. The last step to perfecting the shot is framing. Make sure you have positioned yourself so that any action you choose, like pointing, can fully be seen in the video. We also recommend getting a tripod so you can set up the shot with ease.
Pro Tip: There are quite a few ring light phone holder combos on the market these are great for filming reels!
Step 3: Use The Right Audio For Your Niche
You're ready, you've got a ring light and a tripod. You've picked your setting, got the lighting down, and are ready to start filming. Now you're ready to pick the right audio that fits your business. While it might be tempting to jump on every single trend there are some that just do not fit what you're selling. Take a look through the feed for the audio you're interested in to see what other profiles are doing. If it's mostly about dogs and you sell candles, chances are that it's not good audio for you. Take a look at what your competitors are doing, start there and then branch off into other audio styles that work best with your niche. Make sure you listen to them a few times and practice them as if you're filming before hitting the record button. The best reels are often, slightly rehearsed, especially if you're trying to get the timing right.
Pro Tip: When trying to perfect timing slow it down to half speed and practice.
It doesn't seem so scary now, does it?! You have the tools and this guide to get you going. Remember reels are meant to be fun and easy to make, if you're struggling it's not worth it. Take it slow at first until you're fully comfortable on camera. Make sure you get the lighting and the framing correct and picked the right audio for your niche. Most importantly, have fun! That's what your potential customers will love the most!